Testing Process Of Ireeda’s Thermal Rifle Scope(Part 1)
Engineer Manager:
MS. Melin,
WhatsApp:+86-18291418396,
Email: melin@ireeda.com
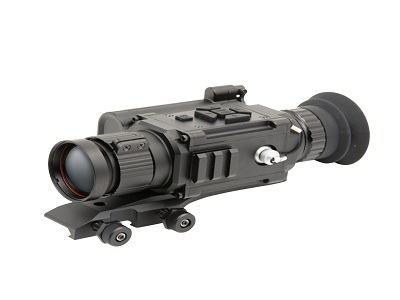
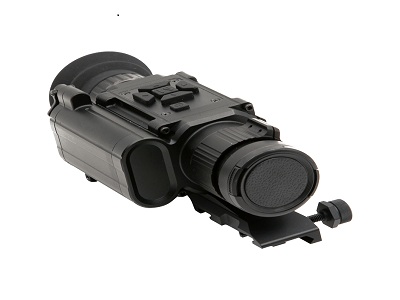
Ireeda's thermal rifle scopes are of high quality and have received many praises. In addition to our professional R&D team, there is also a process that plays an important role, that is, strict testing before shipment. The testing is divided into two parts. The first is static testing, and the second is environmental testing. Today we will introduce to you what static testing includes and how these processes are performed. Let’s begin.
1. Appearance
Visually check that the surface of the thermal rifle scope should be free of rust, paint peeling, scratches and mechanical damage, and the scale line and marking should be clear and even.
2. Mechanical operations
Manually check the eyepiece and objective lens adjustment hand wheels. The hand wheels can be rotated smoothly without any stuck.

3. Optical system
Visually check that the optical system is clean and free of dirt from the direction of the eyepiece, and the aiming cross should be clear.
4. Electrical system
When the thermal rifle scope is turned on, check the OLED display. Check the adapted firearm model, preset firing meter type, ammunition selection, shutdown, brightness and other functions one by one. The aiming cross should be clear.
5. Interface
It can be adapted to the interface of small and medium-caliber firearms such as sub-machine guns, automatic rifles/general machine guns. Fix the thermal rifle scope on the Pica-rail, shake it and observe whether the scope can be fixed firmly without moving.

6. Battery reverse connection and discharge protection
Visually check the battery model used in the thermal rifle scope, reverse the polarity of the battery, and install it into the thermal rifle scope. If the battery can be installed into the thermal rifle scope in reverse and there is no safety risk, turn on the power switch for about 5 seconds. Turn off the thermal rifle scope, install the battery in the normal way, and check whether the thermal rifle scope and battery are damaged.
7. Field of view
Use a field of view measurement tool with an accuracy of no more than 0.1°to measure the field of view of each thermal rifle scope 3 times, and the average is taken as the final result. The measurement results are rounded to 0.1°.
8. Eye point distance (mm)
After using the diopter tube to confirm that the thermal rifle scope is at zero position, use a 0.5 mm aperture diaphragm to move behind the infrared eyepiece, observe through the aperture diaphragm until the full field of view of the image side is just visible, and measure the distance from the rear surface of the eyepiece to the aperture diaphragm three times, and the average is taken as the final result. The measurement results are rounded to 1 mm.

9. Noise Equivalent Temperature Difference
Use test equipment with an accuracy no greater than 10 mK to test noise equivalent temperature difference (including positive and negative temperature differences)of the 1 f0 spatial characteristic frequency of the thermal rifle scope 1 time, and the test results are rounded to 10 mK
10. Working stability
Use normal timing tools to start timing from the moment you press the switch of the thermal rifle scope until the display displays all content and the target background is clear. Take the average of three tests and round the test results to 1 second.
That is all for today’s introduction. We will introduce the process of environmental testing in the next article.If you are interested in our thermal rifle scope, please feel free to contact us and discuss with us. See you all next time! Bye!
Engineer Manager:
MS. Melin,
WhatsApp:+86-18291418396,
Email: melin@ireeda.com

